Sunday, December 26, 2010

Java Tutorial #15

0
Accessing method (with an argument inside the parameter) into another class

Again, the first thing to do is to create a new subclass.  Of course, that subclass will hold a method that later will be implement to our main class.  In order to understand this topic you must knew already how to make a method and that is recently explained in the previous topic.  So, I recommend everyone to read the previous topic before this one.
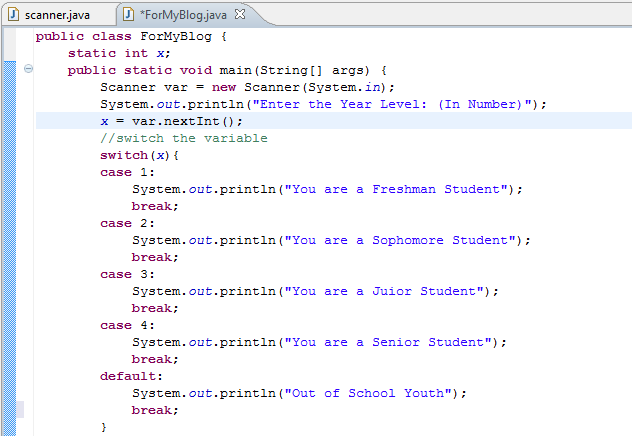
This method will hold an argument inside its parameter.  When a method is about to use a variable, the type of that variable must be declared inside the parameter of that method.  That is called an argument. "String " is the variable's data type and "Name" is a variable's name.
Consider this example


In this example, the method called “Method” will be using the variable “Name”.  So, in order to use that variable the method must declare the “Name” data type.  The type and the name of the variable will be placed inside the parameter of the Method and it is called an argument.
“It is an extra data needed by the method in order to work”, bucky said.
That method will simply print the word “Hello” plus the variable “Name”.  The argument specifies that the variable “Name” is a string.
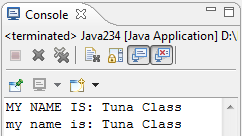
 Back to the main class, import and create a new Scanner and create a new object.  Then, print an instruction to the user.  Use the method, you created from the subclass.
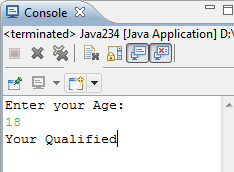


The Output


Java Tutorial #14

0
Accessing a method (with empty parameter) into another class
                                 

 First thing to do is to create a new class (sub-class. If you already have your main class) 
You can do this by clicking the new class icon in the toolbar then choose "Class".
In the Dialog Box, uncheck the check box with the option of "public void static main(..)" then Finish.


In the SubClass.

Then create a new method.  A Method is a function inside your program.  It is like a little sub-program inside your main-program.  You can type actions and bunch of codes inside this method.


public means that all of the class can use this method. This can be replace by private which means that only that class can use the method. But, in this case, we don’t need to do that.
void means that the method will gonna do something but it will not return any data at all. This can be replace by any data types you want to associate with your method.  e.g. String if the method will return a string value.  int if the method will return an integer value.
MethodName( ) is any name you want to associate with your method. In this case, we will not put a parameter inside that method.


In the Main Class.


After creating your method, go back to your main class.  Then connect your main class to your sub-class. This can be done by creating an object that will hold the data from your subclass to the main class. Here’s how:

First indicate the name of your subclass. 
Create an Object. You can assign any name for your Object Name. 
Put an equal sign and type the word “new”, the name of your subclass and put an empty bracket.


Then you can now use the method declared. By using the Object you previously declared and the name of the method you created from the subclass.


After that it will output this one. It will do the command you created from the subclass.


Wednesday, December 1, 2010

Java Tutorial #13

0
Do-While Loop in Java
It will first execute a body of codes before testing for a condition.  Its general equation is:

do{
statements;
}while(condition);

Where:
condition = is where the loop will stop.

You maybe find this very similar to the while loop (because I use the same problem) but as we move on you will see their differences.  But for now, the obvious difference is that the while loop will test first for a condition then execute a command while do-while will execute a command first before testing for a condition.  Consider this example.


Java Tutorial #12

0
While Loop in Java
It’s general equation is:

while(condition){
Statements;
}

Where
Condition = is where the loop stop.
while keyword allows you to execute a blocks of commands by writing only one block of code for it.  Consider this example, 


Java Tutorial #11

0
For Loop in Java
The for statement is one of the useful statement in Java.  The for keyword has three arguments.  The first is where you want to start the Loop (INITIALIZATION), the second is where you want to end the Loop (CONDITION), and the last argument is how much you want to increment to value(INCREMENT).  Its general equation is:

for(INITIALIZATION, CONDITION, INCREMENT){
Statements;
}

NOTE: Variable++ will only increment a value of 1.  Variable+=value will increment a specific value which is greater than 1.

Consider this example


Java Tutorial #10

0
The Switch Statement in Java
The switch statement syntax is also the same as the C++.  It’s general syntax is:

switch(variable){

                case value1:
                Statements;
                break;

                case value2:
                Statements;
                break;


                default:
                Statements;
                break;
}

Where:
variable =  is the variable you want to switch
value1, value2 = is a Boolean value.   It can’t be a target of conditions.  It must be a numeral value not a character nor a string.

The switch statement is the enhanced version of if statement.  You maybe find it similar to if statement but switch statement is much more different to if statement.  The switch statement cannot be a target to any conditions of values.  The case can’t be a target of conditions to a value.  So, if you are about to use a conditions, still it is a good idea to use if-else if-else statement.   Consider this program.


Java Tutorial #9

0
The If Statement in Java
The Basic Syntax of if statement in C++ is:

if(condition/s){
Statements;
}
elseif(condition/s){
Statements;
}
else{
Statements;
}

But this Syntax will not work in Java.  The new syntax of if statement in Java is:

if(condition/s){
Statements;
}
if(condition/s){
Statements;
}

In this first syntax, multiple ifs is acceptable to Java.  But if you like to implement the general concept of if-elseif-else statement (which is very similar to c++) to your Java Program, you can still use it using this syntax.

if(condition/s){
Statements;
}
else if(condition/s){
Statements;
}
else if(condition/s){
Statements;
}
else(condition/s){
Statements;
}

 Consider this example.


Java Tutorial #8

0
More of the Scanner Topic

This is another example of the Scanner Topic.  This time the Scanner will store a double value.  Consider this simple program. 
How this program works?
First the program will ask for a first number to add.  After you enter the first number,  It will ask you again to input a value which will be the second number to be add.  After, you enter the second value, the program will add the two values and display the result to the console.


TO THE CONSOLE, It will display this..


Saturday, November 27, 2010

Java Tutorial #7

0
The Java's Scanner


Java Scanner is used to store variables and string you inputted in the console.  For example, the program requires you to put/type any number.  The string or the number you inputted in the console is being stored by the the Scanner.  So that later your program can access the data you inputted.  In able to use the Scanner you must import it to your Program (at the top part of your program see the first picture below) just type "import java.util.Scanner;".


Now, you have imported the Scanner in your program, you can now assign a name into that Scanner just type the word "Scanner scannername = new Scanner(System.in);". Note that you can have any name for the scannername.  Any character is qualify for a ScannerName.  


Now, we created a new Scanner.  The question is how we can access the data inside it.
In order to access information inside that scanner, first call the variable you stored to that scanner, put the equal sign then second put the scannername ,put the dot symbol (.) and type one of the ff keyword 

nextLine( );  --->  If variable is a String or a Character.
next( ); ---->  If you want to leave the cursor the last letter of the String.
nextInt( ); --->  If the variable is an Integer.
nextDouble( ); --->  If the variable is a float/double Value.

(ex. variable = scannername.nextInt( ); if the variable is an Integer)

For example, a program that will ask you to enter your name and then it will output the greeting "Hello " plus your name.  Later, your name will be stored in the Scanner then the program will access/process the information you inputted and add the word "Hello  " to it. Consider this example.


Java Tutorial #6

0
More of Math Class Function in Java Programming

Build in Function for Ceiling and Floor Value
  Math.ceil(value); , Math.floor(value); is the reserved words for finding the ceiling and the floor value.  This is also known as nearest value function.  This can find the nearest up and down value of a number.  Consider the example below.

Build in Function for Power
   One of the commonly used function in Java is the Power function.  Usually used for exponential functions and inverse function mainly concerned for trigonometry functions.  Math.pow(base, exponent); is the reserved word for it.  See example below.

Build in Function for Square Root
    Also the same with the Power function this is one of the easiest yet most applicable function widely used today.  Mainly this is concerned for different mathematical computation.  Math.sqrt(value); is the reserved word for it.


You can now explore some of the Math class by using them one by one. Hope this topic helps you out.

Java Tutorial #5

0
Different Math Class in Java


This topic will include multiple Math Class Function that is very applicable to Java Programming.  There are so many Math Class Function to Java Programming but I will only mention some of it (The Function that very commonly use to some applications).  So, Let get Started.

Build in Function for PI = 3.1416;
   Math.PI*value is a reserved keyword in Java.  This keyword will automatically initialize the nearest value of PI.  This is commonly used keyword for finding the Area, the circumference, and volume of different circular figures.  Consider the first bunch of codes in the program.

Build in Function for Absolute Value
    Math.abs(value) is also a reserved word in Java Programming. This keyword will automatically omit the negative signs to your integer.  It will convert the negative integer into positive.  Look for the second group of codes inside the program below.

Build Function for Maximum and Minimum
    This Function will take two arguments.  The two value you want to compare.  You can assign the value to a variable or you can directly type it.  Math.max(value1, value2) for maximum and Math.min(value1, value2) for minimum.


Java Tutorial #4

0
The .replace( ) Function in Java


This is one of the easiest yet the most commonly used keyword in Java.  It is used to replace a character or a group of String to an existing String.  This function will take two arguments.  The first argument is the OLD CHARACTER you want to replace with.  The second argument is the NEW CHARACTER/WORD that will replace the old/existing group of String/character.

START------->
Consider this example.  Like I said a while ago, this is one of the easiest function so I don't have to spend more word for it.  The explanation is the comment inside the program.  Read those green lines then later you will get it.


I hope you get it. For questions,  you can put it to the comment box below this one. Thanks.

Friday, November 26, 2010

Java Tutorial #3

0
The toUpperCase() and the toLowerCase() Function in Java

The two functions is use to output or to display a string in a Lowercase or in the Uppercase. So, Let us make use of it..!

START------>
I think it is a SELF EXPLANATORY FUNCTION so I will not spend more time to it.  I will show you some example then BOOM you will come up to the I GET IT state. 


Java Tutorial #2

0
The Two ways to do a Process of Concatenation
This article will show you the two concatenation process available and valid to Java.  One way is by using a symbol "+" and the other way is by using the ".concat( )" method.  You will later know what is the difference between the two.

START----->

The "+" symbol is using by the concatenation operation.  It is use to concat (combine) two strings, variables, characters and others. In the previous program we make sense the use of the "+" symbol.  We use the "+" symbol the combine the string "n1 is " and the value of the variable n1.  (We don't want to spend more time hark backing some things that uses our very important sense , the common sense.) Now, Let's move to the other way.  The .concat( ); function have some similarities to "+" operator (NOTE: .concat() is not the same as "+"), aside from a fact that "+" can concat any variables compare to .concat( ) function who can concat only a string.  For example, (Explanations is on the comments!)


Tuesday, November 23, 2010

Introductory Topics before you start writing Java Codes

2
Different Data Types (most commonly use)

This short topic can give you an idea for different data types that is available to use on either the Java and C++.

a.) double num1 . . .  ;
     use to specify that the variable is a decimal point number. ex. 5.68 
b.) int num1 . . . ;
     use to specify that the variable is an integer. ex 7840 
c.) float num1 . . . ;
     same as double except that this type can handle bigger bits of decimal numbers. ex. 0.903994
d.) String word;
     use to specify that the word is a Character or a String.

Arithmetic Operators
Addition, Subtraction, Multiplication and Division.

Logical Operators

a.) Logical AND (&&)
shows that the two conditions must be satisfied in order to do a command.
Example:


The Console will ask for to enter grade then it will compute for the Grade. Later, It will decide whether the average is less than or equal to 100 and average is greater than or equal to 97.  If it is so, it will display the message "Your Great" otherwise "Better Luck next tym".


b.) Logical OR
shows that either one of the specified conditions must be meet in order to do a command.
Example:
if(x<90 || y=110){
. . . . . . . . . . . . . . . .. . . . ;
}
c.) Logical NOT
shows that if the conditional is not equal to a certain value a command will be executed.
Example:


Ternary Operators
-It uses the symbol (?).  It is a conditional that test if Exp1 is True, then Exp2 will be the value of the given expression.  If Exp1 is False, then Exp3 will be the value of the expression.
General Equation:
Exp1  ?  Exp2 : Exp3
Example

Then it will Output this one.


Incrementation and Decrementation
-It uses the symbol (++/--).  It is an operator that will add a certain value (usually 1).  It is the same as saying x = x +1.  Meaning the previous value of x will be added by 1 everytime it reach a certain condition.  So you must set a condition that will end up the adding process of the variable.
Example


In the created program, the console will keep the displaying the word "Enter grade:" until the counter reach the value of 3 (note that I initialize the value of the counter by 1).  The Program stated that WHILE the counter is less than or equal to 3 (meaning from 1 to 3), the program will keep on displaying the command "Enter Grade".  The Scanner will save the value you entered and do some operations. Finally, the program will display the output. The Console will display this one.


Java Tutorial #1

0
This site will link some of the useful and beginner oriented videos on youtube to help you on your studies.  Hope this help.  Now you have your main class created, you can now start typing codes to your program.  In our Computer Programming Class, our introductory topic is all about JOptionPane.  Most codes of the Java are originally came from C++ or some of TurboC.  So, some of my classmate didn't find Java as hard as they expected it will.  But for some considerations to those who are not yet taken either the TurboC or the C++ let me give some ideas of the TurboC and the C++ as far as I know it.  So lets get started. Let me start the topic to Basic Output Process of the Program.
Example: This program will output the value of a variable as you initialize it.

What you must know first?


Different Class Specifiers in Turbo C:
Data Type    Control String           Definition                 Example
Char               "%c"                used for ouputting a               'W' or 'p'
                                               letter or a symbol.


Char                 "%s"               used for outputting two          'Yes!' or 'Pie'
                                                   letters or symbols.


int                    "%d"            used for outputting integers.      '56' or '12'

float/double      "%f"             used for outputting numbers      '5.2648'
                                                  with decimal places.


Note: This Program will shows the difference between println and printf statement.

By using printf:


It is will ouput the number and some unnecessary zeros showing that it is a double/float specifier.
You can limit the variable's decimal places by adding a decimal point and a number to the control string. ex. " .2%f" will display a float number with 2 decimal places. You can change it to 3 or so on.

By using println.


It will output the value of the variable the way you exactly assigned it.  No unnecessary zeros at so on.

Getting Started with Eclipse Helios

0
FAQ: How to create a new Java File in Eclipse Helios?
 Step1: Click on a "New" toolbar, choose "Project" or Go to File(Alt+F), Hover on "New" and Click "Project".


Then a Dialog Box will pop up and expand the Java folder and choose either create a "Java Project" or "Java Project on existing Ant File" and click Next and Enter the File name (it should not contain the character "/") and then click Finish.


Step2: Create a new Java Package. click on the icon at the toolbar or Go to New then Project then click Package.

The Dialog Box will pop up, click on the Browse button and choose the name of your folder who recently created.  The name of your source folder is the same to the name of your Java File. Expand the folder the click the scr folder then you must enter the name of your package (the name of your package should start at a lowercase character)  then click Finish.


Step3: Create your Main Class. Click the icon in the toolbar or Click on the File, Hover on the New then click Class.


The Dialog Box will pop-up, be sure you browse the correct path of the project source folder and the project package folder and then enter the Java Class Name (usually it is started in uppercase character), check the "public static void main(String[] args" if you like to set the class as your main class otherwise uncheck it. Then Click Finish. There you have it. Now you have your Java Class :).